| How to use Slide Tab | ||
| 2 |  |
In the Slide tab, do various operations used for HTML and images. First, create a slide image. 1. Open the folder containing the slide image. The size of the image to be created should be decided on the Others tab. 2. Please drag and drop the image to be used as a slide to the location in ②. You can change the folder on the way. 3. If you save these combinations, you can easily read in the next time and input the name to save. 4. Determine the folder to save the combination. 5, Please press the save button when you decide. 6. When saved, a list of saved names will be displayed. Click this to load a slide image. 7. If you have set up an image transfer server please press the MyServer button., 8. The created slide is saved from slide1.jpg to slide8.jpg in the SlideTemp folder. This is called gif If you want to use as the wallpaper of the file please press the button of ⑧. All slide images are converted from wall1.gif to wall8.gif and saved in the SlideTemp folder. In case 9. Transfer all slide and wall files to My Server. All transferred servers are filenames with MyCall_ appended. You can freely call these in HTML macros. If you do not have My Server, you do not need to transfer it. You can send images created with HTML etc. to the HYBRID server and enjoy them as images. Slideタブでは HTMLや画像に使用するいろいろな操作をします。 まず、スライド画像を作成します。 1. スライド画像の入っているフォルダーを開きます。作成する画像の大きさは Othersタブで決定しておいて下さい。 2. スライドとして使用する画像をドラッグアンドドロップで②に場所に取り込んでください。 途中でフォルダーを変更しても構いません。 3. これらの組み合わせを保存しておくと 次回は簡単に読み込めるので 保存する名前をインプットしてください。 4. 組み合わせを保存するフォルダーを決定してください。 5, 決定したら保存ボタンを押してください。 6. 保存すると保存された名前の一覧リストが表示されます。 これをクリックするとスライド画像が読み込めます。 7. 画像転送サーバーを設定されている方はMyServerボタンを押してください。 8. 作成されたスライドは SlideTemp フォルダー内に slide1.jpgからslide8.jpgで保存されています。 これを gif ファイルの壁紙として使用したい場合は⑧のボタンを押してください。 スライド画像がすべて wall1.gif からwall8.gifに変換されSlideTempフォルダーに保存されます。 9. すべてのslideとwallファイルをマイサーバーに転送します。転送されたサーバーには すべて MyCall_ が付いたファイル名となっています。 これらを HTMLのマクロで自由自在に呼び出すことが出来ます。 なお、マイサーバーをお持ちでないかたは 転送の必要はありません。 HTML等で作成した画像をHYBRIDサーバーに送り画像として楽しむことが出来ます。 |
  |
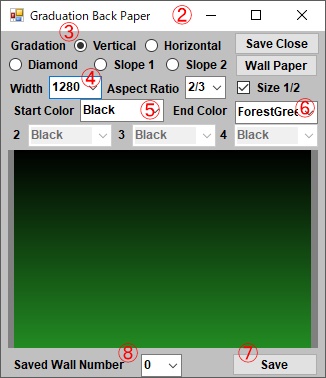
It is the creation of the background gif file used for HTML. This is something
you can load a small background gif file. There are many cases attached to software that creates homepage, but we use that wallpaper. Also, since there are wallpaper sites available for free, I think that it is good to download it. |
|
  |
|
|